Final Animation and Demo Reel!

•May 6, 2012 • 3 Comments

The semester is over and I officially have a masters degree in Biomedical Visualization!!! 🙂 Here are the final projects I created for my animation class. I used the embryos I sculpted for my research project and repurposed them in my animation-which shows how the head regions of an embryo develops during Carnegie stages 10-23. Next was to create a demoreel- which is a compilation of my 3D work (like a 3D portfolio). Below is my demo reel and under that is my animation. Enjoy! 🙂

Demo Reel 2012

Morphing Embryo Animation:

Research Project: UI Designs

•April 1, 2012 • 4 Comments

I’m still chugging away at my research project, goal is to have it all done within the next couple of weeks! I have all my models created and morphing. Now I’m putting some final touches on getting all the morphing muscles, nerves, brains etc to sync up correctly. As easy as that might sound- it’s actually been insanely tedious and many many many hours later- I’m still trying to get it just right. I’m making progress and will hopefully have it all synced up very very soon! While I work on finishing that up and adding interactivity to all my models in Unity, I thought I would share what the final interactive will hopefully look like! Here are my User Interface designs:

More Embryos!!

•February 14, 2012 • 1 Comment

It’s about time for a new post and an update on my research project!
For the animation class I am taking this semester, I decided to re-purpose some of the models I have created for my research project to create an animation. For this animation, I am planning on showcasing the morphing head/neck regions of Carnegie stage 10-23 embryos. Below is just a test animation that plans out my camera moves etc., but it also lets you see how the embryo morphs! (The embryos in this test animation are low polygon models- so as I continue to work on this animation and work with higher polygon models and/or normal maps, the final faces will have more detail) Next step is to start experimenting with textures and lighting! Read below the animation for more information about my research project!

My research project aims to visually clarify pharyngeal arch nerve and muscle growth in the developing human embryo. Using sectioned embryo data from the Carnegie collection, I am creating a 3D interactive program that will animate and morph between Carnegie Stages 10-23 embryos, developing brains, and pharyngeal arch nerves and muscles. The user will be able to interact with these morphing models 3-dimensionally and gain a greater visual understanding of how the muscle masses in each arch develop into their respective muscles, how the nerve associated with that arch follows the muscles, and how they all sit in 3D space. The animation I am creating for my animation class will hopefully be incorporated into the 3D interactive as well. Images from my research progress to come soon!

Ductus Venosus Shunt in the Embryo

•December 20, 2011 • 1 Comment

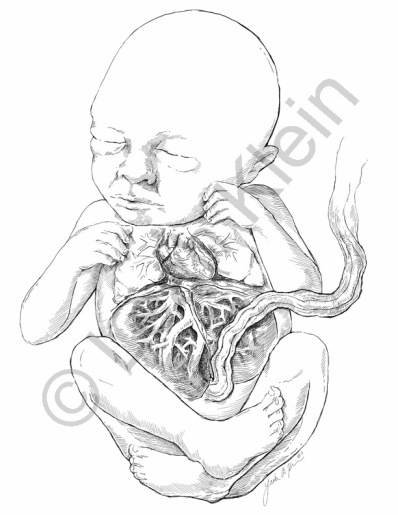
I also took an independent study this past semester to work on some pen and ink illustrations.  This is one of the illustrations I created in that class.  I used Corel Painter to create this illustration, which depicts the ductus venosus shunt in the embryo.

The ductus venosus shunts blood from the umbilical vein directly to the inferior vena cava and then into the heart.  This allows oxygenated blood coming from the mother to bypass the liver and travel directly to the heart,where it will be pumped to the rest of the embryo’s body.  After birth this shunt will close and become the ligamentum venosum.

Cancer Metastasis Animation

•December 13, 2011 • 1 Comment

Yay a new blog post! 🙂

I apologize for the lack of posts these past few months.  I’ve been insanely busy with school projects and my research project.  My semester is now over and  I thought I would share the animation I created for the animation class I just took.  The animation shows the process of cancer metastasis- which is how cancer cells can travel to different places in your body.  This animation focuses on cancer metastasis through the bloodstream.

Enjoy!!


More posts to come soon featuring more of my work from this recent semester!

Surgical Orientation Projects!

•August 15, 2011 • Leave a Comment

The summer semester is now over and it’s time to post some more of my work!

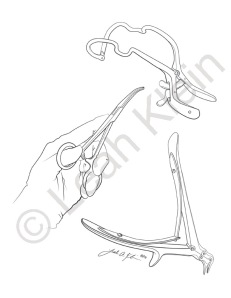
One of the classes I took this past summer was Surgical Orientation.  We had two assignments for this class- One was to draw three different surgical instruments.  (I chose to draw (from top) a mouth retractor, a hemostat and a rongeur (bone chipper))

I created this illustration in Adobe Illustrator.

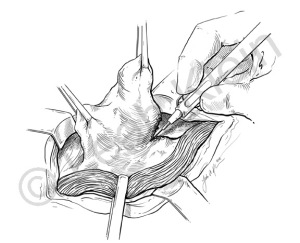
And the other assignment was to illustrate a step in a surgery of our choosing.

The surgery I chose was a mesh plug hernioplasty- which is another way of saying a hernia repair.  I chose to illustrate a direct hernia repair.  I created this illustration in Corel Painter.

Medical Instrument Modeling

•June 1, 2011 • 1 Comment

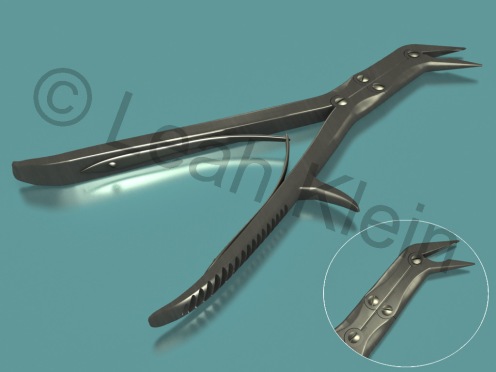
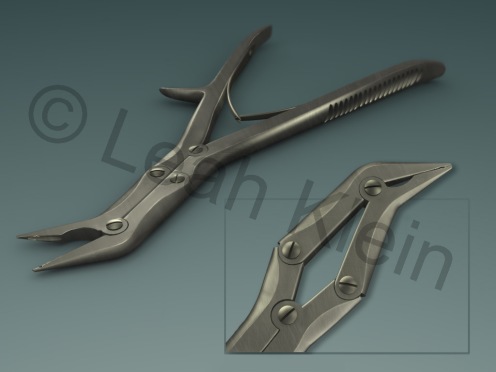
The first assignment in my Computer Visualization class was to model a medical instrument in 3dsmax  (a 3D modeling, animation, and rendering program).  The medical instrument I chose was a bone chipper- used to chip away at bone during surgery.  Once we modeled the instrument, we were to add textures and lighting.  This was a really challenging assignment! The modeling was hard but I learned so much in the process.

Here is the first version:

After the critique for this assignment, I went back and made some revisions.  I changed the instrument’s orientation and tweaked some of the modeling .  I also worked with the lighting to bring out the modeling a little better and changed the inset to show the instrument open.  Finally, I brought it into Photoshop to add some chips/dents to the top of the instrument and for some final tweaks.  I really like how this version turned out!

Learning from Max Brödel!

•May 16, 2011 • 1 Comment

One of the exercises in my Illustration Techniques class was to copy a Max Brödel carbon dust illustration.  Max Brödel is considered the father of modern medical illustration.   By copying his illustration – I learned a lot about different and very effective ways to illustrate various types of tissues.  I used an airbrush, masks and paths in Photoshop to reproduce the illustration.

This was a really fun exercise to work on!

This slideshow requires JavaScript.


Red blood cells, syringes and more!

•May 12, 2011 • 1 Comment

Here are some exercises I did using the program 3dsmax this semester in my Computer Visualization class.

This slideshow requires JavaScript.

The first exercise was modeling, texturing and lighting red blood cells in a blood vessel.  The second exercise was the same for a hemostat and the third exercise was the same for a syringe.

For the fourth exercise we used information from the Protein Data Bank (PDB).  We imported data from PDB into a program called Chimera.  There we could change settings- such as if wanted a ball and stick protein model, if we wanted alpha chains to show etc. Once  the protein model looked the way I wanted, I imported it into 3dsmax and there I added textures and lighting.

For the fifth exercise we went to the Craniofacial Clinic in Chicago and got our 3D portraits taken.  The image captured was then created as a 3d model of my face- which I then imported into 3dsmax. (so yep that’s my face :))When I imported the model it had a very high/dense mesh- meaning there were a lot of polygons used to make the model- which slows down the program and can make it difficult to use later for animations etc.  So I used retopology to create a new mesh with significantly fewer polygons! The wireframe face in image is showing the new mesh I created.

Some additional touchups were done by compositing the exercises in Photoshop as well.

Digital Pen and Ink Illustrations

•May 9, 2011 • 3 Comments


Here are some of my assignments from earlier this semester.

For my Illustration Techniques class, our first assignment was to draw a line/pen and ink  illustration, which we “inked” on the computer.

This is my sketch for the illustration.

We were able to draw anything we wanted and I chose a superior (top) view of the heart valves.

The next step was to bring this sketch into Corel Painter and to start tracing over my lines with the brush tool.  As I started creating this illustration on the computer with my Wacom tablet (a tablet that you draw on by using a stylus/digital pen- which allows the user to draw straight on the computer) I realized that some of the lines I had initially drawn in my sketch needed to be changed.  I made these changes on my Wacom tablet as I created the illustration.

Here’s my final illustration:


I really enjoyed working on this illustration and would definitely like to do some more line drawings in the future!